

Table of Contents
1. Introduction
This technical note will discuss how to merge multiple Datasets to view all tags on one Virtual View. Security will be enabled to restrict and enable certain users to access and interact with the View.
Datasets are groups of logically associated tags stored within the Canary Historian. Your Historian can consist of multiple Datasets that are sourced from multiple data collectors.
Virtual Views is a tool that provides the ability to add and manage additional data context on top of the historical record for applications and clients, hence they are created on top of the Historian.
They can reshape historized tag formats without altering the actual data in the physical storage. This includes data structure changes, tag aliasing, and asset modelling. You can restrict data access and viewing by creating security-based permissions to clients based on the data they are allowed to view inside the Historian.
In essence, the Virtual Views is the filter that the client looks through to browse, retrieve tags and read data from the Historian. This allows the administrator to control what the client can access and interact with.
By creating Virtual Views, you create a unified tag naming structure that simplifies the generation of reports based on historian data and trend data.
Security is handled by controlling the View access in the Canary Admin application.
There are 3 main steps that you need to follow to merge Datasets on Virtual Views:
- Create Virtual View for multiple Datasets
- Define rules for View
- Set up client security
These steps are described in greater detail in the following sections.
2. Create Virtual View for multiple Datasets
The first step is to create a Virtual View sourced from multiple Datasets. Ensure that all necessary Datasets have been created and houses data. This can be done in the Historian tool on the Canary Admin application.
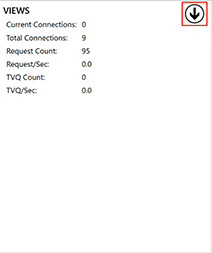
- Launch the Canary Admin application and navigate to the “Views” panel.

2. At the top left corner, you will notice a “Views” panel. In the top right corner of this panel, there is down facing arrow. Click on this arrow to access the Views options.
3. Click on the “Create New View” button.

4. The “Create View” window will appear. Fill in the relevant details to create a new View:

- View Name: The name of your model view
- Source Views: This is where you select the View from which you want to base the new model. Once a View has been created, it can be used in other Views. This will allow a “master” View that will update “children” Views
- Properties: Here you can specify metadata if you wish. Separate the properties by a semicolon followed by a space
5. Once you have added a source for a DataSet, you can add another by clicking on the “Add Source” button. You can add multiple sources.

Your “Source Views” will look something like this, once you have added all your Datasets. Click “OK” to create the View.

3. Define rules for View
After creating your new View which is sourced from multiple Datasets, the View will automatically display the page as seen below. This is where you can define Asset and Model Rules for this Model.

Before clicking on the “Create” button, you can browse the tags to ensure that the data has been collected from the correct Datasets and create Rules to enable simpler viewing of the tag data.
To view the data, click on the “Unassigned” drop-down arrow in the yellow bar at the bottom of the screen.

Once you have confirmed the correctness of the data, go ahead and start by creating rules for the model. Click on the “Add” button in the top panel.

When you create Rules, they will be displayed in the top panel and all information regarding that rule will be displayed as well. This includes the number of matches, duplicates, instances, exclusions and response time to populate.
As you add these Rules, the tag data in the lower panel will update as well. On the right-hand side, the actual tag names as stored in the Historian will be displayed. On the left-hand side, the modified tag names as it will be viewed in the Virtual View is displayed.
Rules are executed in top-down order. To change the order of the Rules, you can drag and drop the rules as required. Rules also have the option to be edited or removed. Click on the rule to highlight as option, and then click on the “Edit” or “Remove” button.
You can choose between a “Model Rule” or an “Asset Rule”. A Model Rule can be created to match and replace tag names or tag structures. An Asset Rule can be created to group tags into an asset.

Make use of RegEx to create common tag names and group them into assets. Common tags names with unique identifiers shows you where the asset is located and which other tags it impacts.


After adding all the desired rules to conform your tag data, click on the “Create” button in the red bar to create your new View.

4. Set up client security
To control View access, you can enable security for the View on the Canary Admin application.
- Click on the Views panel and select “Configuration” from the bottom menu
2. Select the “Access” option from the left side menu

3. For each category (ALLOW, DENY, ALLOW(Secure Endpoint), DENY (Secure Endpoint)), you can “Add” or “Remove” individual Windows users or groups to grant or deny access to the Views Service.
For example, to grant a user access to the Views, click on the “Add” button in the “Allow” category. In the pop-up window, you can specify which user or user group you would like to add. Click on the “Ok” button once done, and you will notice the user/group has been added under the Allow category.


4. Click on the “Apply” button in the red bar after adding/removing users for the changes to take effect.
If you want to limit users/group to certain Views, you can restrain permissions based on Assets, DataSets and individual tags.
5. Click on the “Security” option at the bottom of the page. Navigate to the “Settings” page on the left side menu. If the security is not enabled, click on the option and click on the “Apply” button.

6. Click on the “Permissions” option in the left side menu. Select the View you want to grant/revoke permissions to. If you have created Assets or DataSets, it can be viewed by expanding the View.

7. Select either the View, DataSets, Assets or individual tags that you want to provide permissions to, and click on the “Add” button in the top-right corner next to Explicit Permissions. This window will pop up.

8. Click on the “user…” button to select a user or user group from the Windows user selection dialog.


Choose which Access right you want to give to the user. Options include:
- None: User is denied all access
- Read: Access is limited to viewing only
- Write: Access is limited to writing only
- ReadWrite: User is granted full access
9. Click the “ok” button and then click on the “Apply” button in the red bar at the top of the screen to apply your changes.

5. Summary
To merge multiple Datasets onto one view and control user access to the view, here is a summary of what you need to do:
- Create Virtual View for multiple Datasets
- Define rules for View
- Set up client security
For additional resourcing, please direct yourself to the Ignition user manual: https://help.canarylabs.com/hc/en-us