

Table of Contents
1. Introduction
Canary can be configured as an Ignition Data Historian. This technical note describes the principal points to follow for a successful configuration.
Canary is a single historian solution which is a performant time-series database. It consists of three components, Data Collection, Data Storage and Data Analytics. Canary’s NoSQL data historian is the engine that delivers enterprise level solutions. HTML based trending, dashboarding and automated solutions are delivered through the web-based reporting tool Axiom.
Ignition is an industrial application platform for collecting data, designing and deploying industrial applications throughout an enterprise. It empowers the creation of any kind of industrial application including SCADA, MES, IIoT, reporting, alarming and more.
To set up the connection between these two components, you will need to install a Canary module in Ignition and configure the connection to write the data to Canary.
There are 4 main steps that you need to follow to connect, store and forward data from and to Ignition and Canary:
- Basic Information
- Download and install Canary module for Ignition
- Configuration of writing data to Canary
- Configuration of reading data from Canary
These steps are described in greater detail in the following sections.
2. Basic Information
We have a general architecture here with simulated PLC’s that are producing data and being forwarded to an Ignition Server. This server has a VM and we will be installing the Canary Module to read data out of that server and move it to another VM, which is the Canary Server where the Canary system is installed.

The Canary System will make it easy to process your data by using Ignition’s Tag Historian Module along with the Canary Module to write Ignition data to the Canary NoSQL Historian database. It can read both raw and aggregated process data back from Canary and publish it to Ignition controls.
The whole idea is to eliminate the use and management of a traditional historical database.

3. Download and install Canary Module for Ignition
You will need to download the Canary Module for Ignition. It is free to download by clicking on the link below. It will take you to the Canary website where you can download the module:

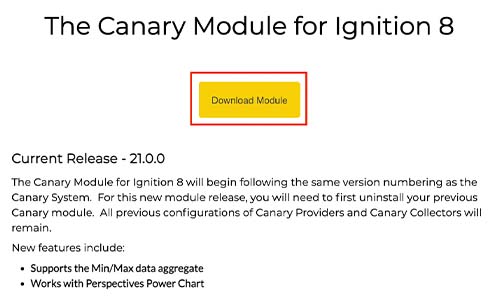
You will need to fill out your details on the right-hand side of the page in order to receive an email with the download link. Once you have received the email, click on the link and a new page will open in your browser. Click on the “Download Module” button and the download will start automatically.

This documentation assumes that you have Ignition installed and your Gateway configured.
- Launch your Ignition Gateway. Navigate to the “Config” section and click on the “Modules” option. This is where you need to install the Canary module that you downloaded in the previous section.

2. Scroll down the page past all the modules, until you see the option to “Install or Upgrade a Module…”. Click on the link

3. Click on the “Choose File” button, navigate to where you saved the download and open the file. Note that your file needs to have the *.modl extension to be accepted. Click on the “Install” button

4. You will be prompted with a confirmation screen that describes the modules’ certificate details. If you agree, tick the checkbox to agree and click on the “Add Certificate and Install Module” button

5. Upon successful installation, you will be redirected to the Module page, and when you scroll down to the bottom of the page, you will be able to view the Canary certificate and module there

4. Configuration of writing data to Canary
This documentation assumes your Canary Historian Server is already configured, which will include the Canary Admin and Sender Service.
- Open the Canary Admin application on your Ignition Gateway and navigate to the Sender tile

2. Use the “Configuration” menu at the bottom of the screen and open the “Endpoints” menu on the left-hand side. Click on “Https – Anonymous (Web API)” to enable it, and make sure it uses port 55253. Click on the “Apply” button at the top of the red bar to apply the changes

3. Select the “Access” menu on the left-hand side and click on the “Add” button in the Allow window

4. Add “Anonymous Logon” to the Allow window and click on the “Check Names” button. When the name is underlined, you can click on the “OK” button

5. Once added to the Allow window, click on the “Apply” button at the top of the window

6. Navigate to the Ignition Gateway and open the Config menu like before. Scroll down until you find the “Configure Collectors” option under the “CANARY” heading

7. Select “Create New Collector”

Configure Canary as a tag Storage Provider within Ignition by completing the following fields:
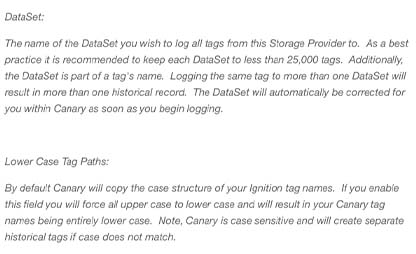
The page will look something like this. Click on “Save Changes” when complete

You may create additional Collectors to enable additional logging to additional datasets. It is recommended that you keep a one-to-one relationship for your Collectors sessions to datasets, meaning do not create multiple Collectors logging to the same dataset.
8. Open an Ignition project and navigate to a tag you wish to enable history for. Right-click on the tag and select “Edit Tag”

You can enable history for a tag and select he newly created Canary Collector as the Storage Provider. Since the module is built on top of Ignition’s Tag History Module you can take advantage of all the history settings that include deadbands, tag groups and min/max times between samples.
5. Configuration of reading data from Canary
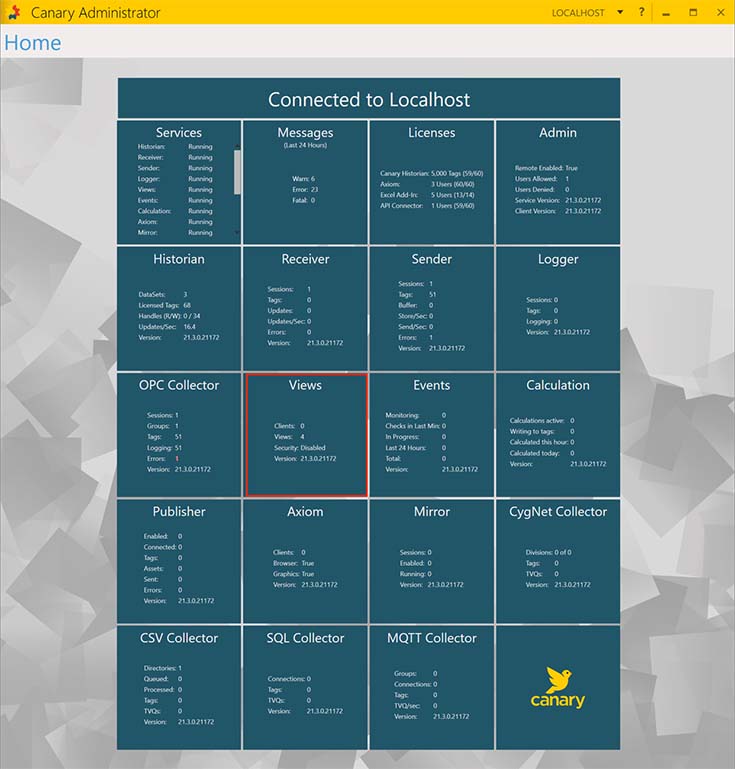
- Open the Canary Admin application on your Ignition Gateway and navigate to the Views tile
2. Use the “Configuration” menu at the bottom of the screen and open the “Endpoints” menu on the left-hand side. Click on “Https – Anonymous (Web API)” to enable it, and make sure it uses port 55253. Click on the “Apply” button at the top of the red bar to apply the changes

3. Add “Anonymous Logon” to the Allow window in the “Access” menu like before

4. Navigate to the Ignition Gateway and open the Config menu like before. Scroll down until you find the “Configure Providers” option under the “CANARY” heading

5. Select “Create new Provider”

Configure Canary as a tag History Provider within Ignition by completing the following fields:

The page will look something like this. Click on “Save Changes” when complete

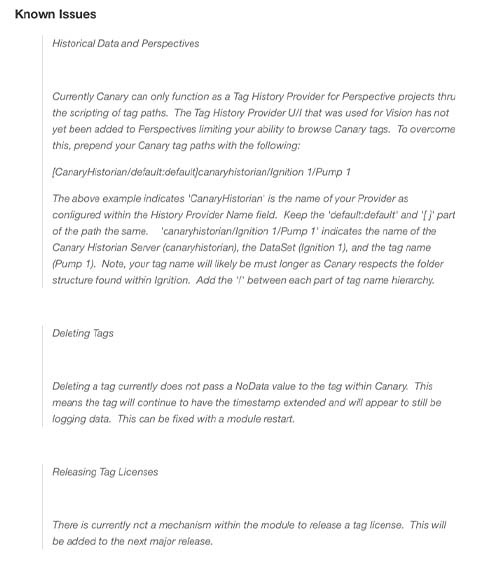
6. Open your Ignition Designer and browse the Canary Historian referenced above as Tag History Provider. Note, not only will you be able to browse the historian archive, but Canary will also expose any Virtual Views and Asset Models created on top of the historical record

6. Summary
To follow to connect, store and forward data from and to Ignition and Canary, here is a summary of what you need to do:
- Some basic Information
- Download and install Canary module for Ignition
- Configuration of writing data to Canary
- Configuration of reading data from Canary
For additional resourcing, please direct yourself to The Help Center here.