

Table of Contents
1. Introduction
Ignition can be configured to send notifications to Telegram. This technical note describes the principal points to follow for a successful configuration.
Telegram is a freeware, cross-platform, cloud-based instant messaging software and application service. Telegram is one of the most secure IM services available as it uses a range of encryption technologies to secure messages and media. This application is available for free download on all app stores.
Ignition is an industrial application platform for collecting data, designing and deploying industrial applications throughout an enterprise. It empowers the creation of any kind of industrial application including SCADA, MES, IIoT, reporting, alarming and more. The trail is available for free download on inductiveautomation.com
To set up the connection between these two components, a Telegram bot has to be created. A bot is a software application that runs automated tasks over the Internet. In this case, a bot is a third-party application that runs inside Telegram. You can interact with them by sending them messages and requesting data. You can control them by using HTTPS requests to the bot API.
Telegram will provide us with a chat ID and API token which is essential for connection. A chat ID is a numeric value that identifies you. You can use a bot to find your personal chat ID. An API token is an access token that contains the security credentials for a login session and identifies the user, groups, privileges and applications.
There are 4 main steps that you need to follow to send notifications from your Ignition project to Telegram:
- Download and configure a bot in Telegram
- Find the chat ID and API token in Telegram
- Create a basic Ignition project / Launch an existing project
- Set up the connection between Ignition and Telegram
These steps are described in greater detail in the following sections.
2. Configuring a Telegram Bot
The first step is to create a new bot in Telegram. To do that we need to use BotFather; it is the main bot used in Telegram to create new bots and change settings for existing ones. Then the API token and chat ID can be.
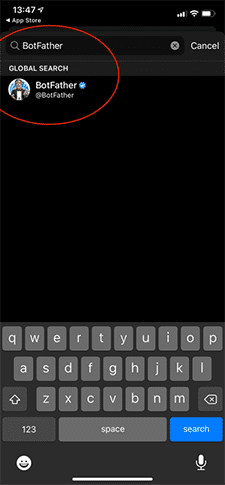
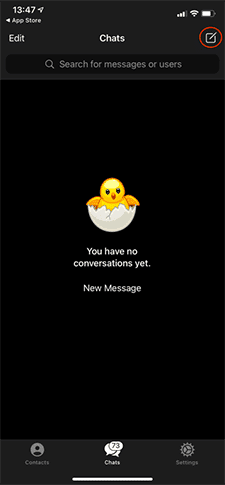
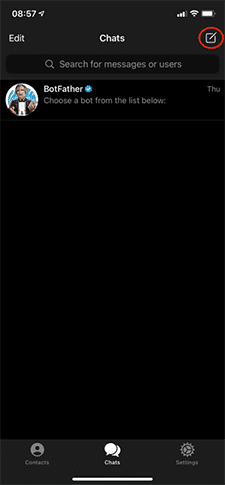
- Firstly, create a new chat in Telegram. Search for “BotFather” and click on the result to start a new chat.
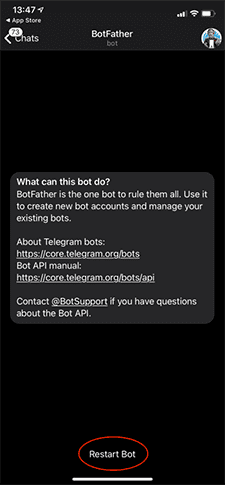
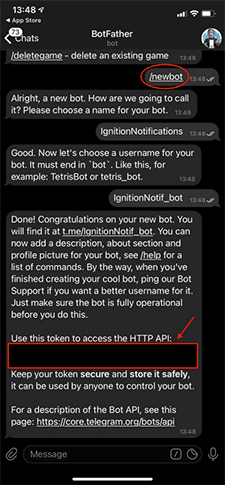
2. You will be greeted with this message. When you click on the “Start Bot” button, you will receive the following commands in conjunction with creating a new bot and bot settings.
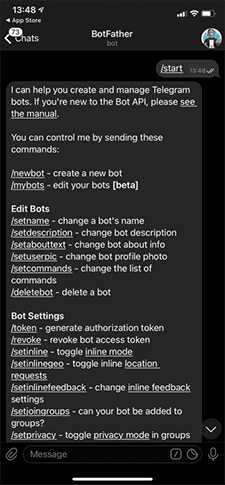
3. Use the /newbot command to create a new bot. The BotFather will ask you for a name and username, then generate the authorization token for your new bot. This is your API token.
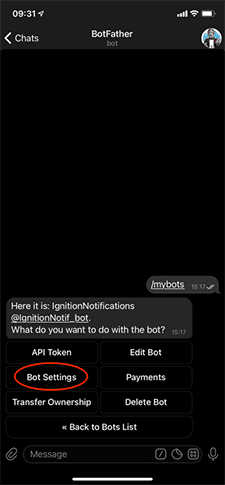
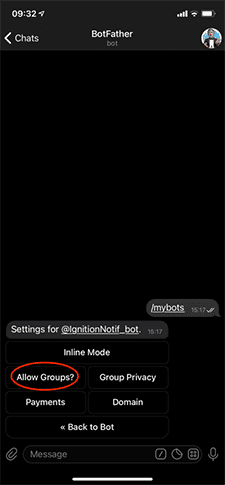
4. Secondly, you need to allow your bot to be added to groups. In your current chat with BotFather, type ‘/mybots’ to access your newly created bot. Click on the ‘Bot Settings’ option. Click on the ‘Allow Groups?’ option.
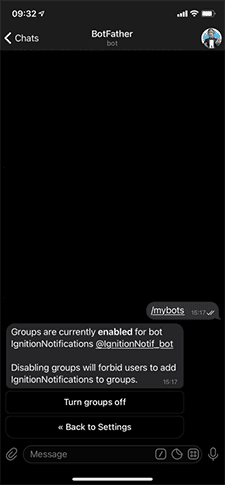
5. This option enables the option for your bot to be added to a group chat. Make sure that it is enabled before mobbing onto the next step.
6. Lastly, a group chat ID is needed. A group needs to be created, and the bot needs to be added to that group.
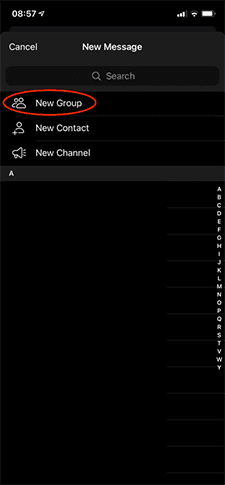
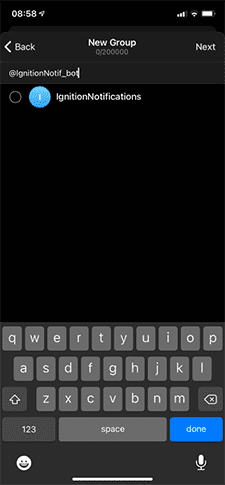
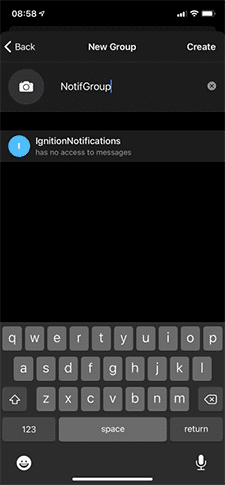
The bot needs to be added to the group. Type in the handle name of the bot and select your bot once it appears in the search results. Enter a name for the group and click on “Create”.
7. Open an internet browser, and type in the following URL:
https://api.telegram.org/bot{API TOKEN HERE}
Replace the {API TOKEN HERE} with your API token you received from BotFather, excluding the {} brackets. Your browser will return a list of JSON data. Look for the chat ID, which will be in the first two lines. A group chat ID will have a – as a prefix, that is how you know you have the correct ID.
This is your group chat ID.
8. Now that the API token and chat ID have been created, it can be utilized in an Ignition project.
3. Setup connection between Ignition and Telegram
To demonstrate how Ignition can send notifications to Telegram, a basic Ignition project with only a button component will be utilized.

The button component will act as the intermediary between an action in the Ignition project and the notification in Telegram. To enter the event script console of a component, double click on the component, and a screen similar to this will appear:
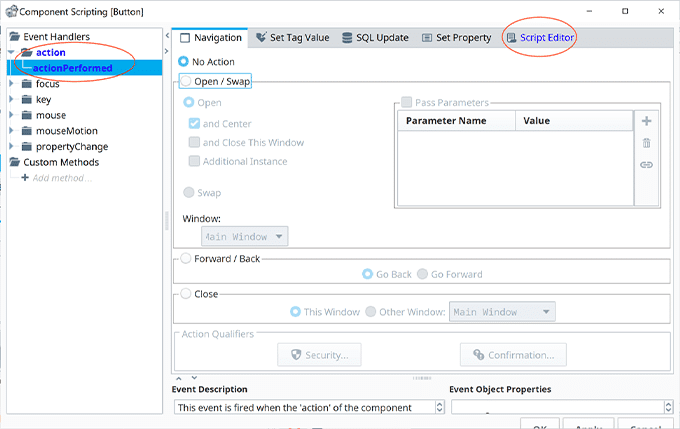
The actionPerformed option on the left side panel will be automatically highlighted. This is the action event in which to code the connection. Click on the “Script Editor” tab and enter the following Python code:
url = “https://api.telegram.org/bot{0}/sendMessage?chat_id={1}&text={2}”
apiToken = “ENTER YOUR API TOKEN HERE BETWEEN DOUBLE QUOTATIONS”
chatID = “ENTER YOUR CHAT ID HERE BETWEEN DOUBLE QUOTATIONS”
chat = “Your message”
finalURL = “https://api.telegram.org/bot” + apiToken + “/sendMessage?chat_id=” + chatID + “&text=” chat
system.net.httpGet(finalURL, 10000, 60000)
Your code should look something like this:

The url variable contains the API connection URL to the Telegram bot. This URL will be used in the finalURL variable where the apiToken, chatID and chat variables will be replacing {0}, {1} and {2} respectively.
Enter your API token in the double quotation marks next to the apiToken variable. Do the same with your chat Id next to the chatID variable.
For the chat variable, enter in double quotations your own message that you would like to send to your Telegram bot.
For the finalURL variable, replace all as shown above.
The GET request will be sent through the system.net.httpGet Python package. It needs the finalURL as the first parameter, the connect timeout as second parameter, and the read timeout as third parameter. Parameter descriptions to follow:

To send the notification to Telegram, click on the “Apply” and then the “OK” button.
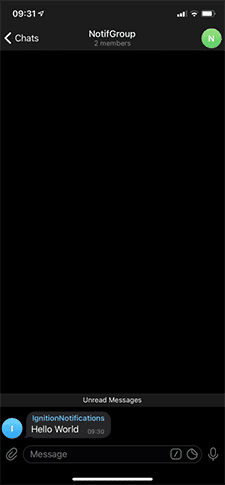
You will be receiving a notification via Telegram in a few seconds from clicking the button:

Once you open the notification, you will be directed to the group chat, where the bot received the message from Telegram and displays it as a message.
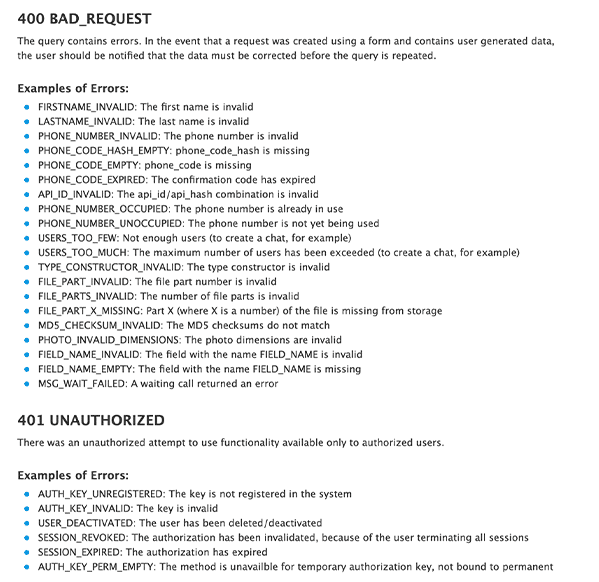
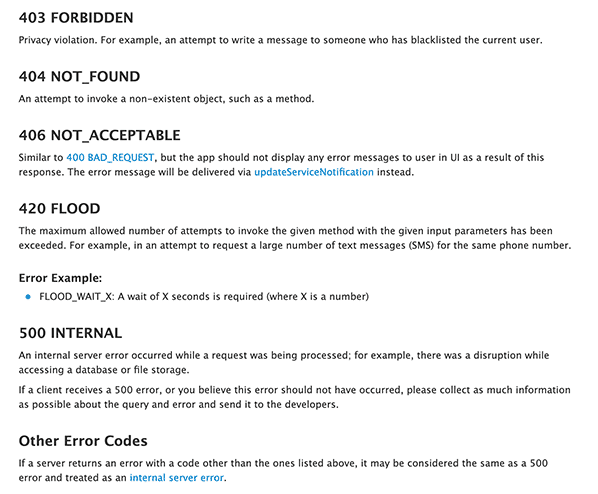
Error Handling
If you do run into some server request errors, here is a list of the potential problems that could be inside of your script:
4. Alarm Event Trigger
The alarming feature in Ignition provides the functionality to set up and control alarms. Alarms can be configured on Tags, which will be demonstrated in this section. Notifications can be delivered to users when an alarm is triggered.
Alarm Notification Pipelines are drag and drop logic diagrams that you can configure to control how any of your projects’ alarm notifications are sent to end users.
We will demonstrate how to create an alarm for a tag, create an alarm pipeline and connect the pipeline to the alarm in the example to follow.
- First, a tag needs to exist on which the alarm can be configured. In this example an OPC tag is used. The tag Name, OPC Server and OPC Item Path is set up. A basic alarm has been added to trigger the alarm when the tag value is below or above a certain setpoint.


The tag browser displays the tag together with a bell icon to represent the alarm function on the tag.
2. An On-call Roster and Alarm Notification Profile needs to exist on the Ignition Gateway before an Alarm Pipeline can be created. Here we have a basic admin On-call Roster and Email notification profile.


3. Back on the Ignition Designer, create an Alarm Notification Pipeline. In the Project Browser, right click on the Alarm Notification Pipeline option, and click on ‘New Alarm Pipeline’.

4. A pipeline window with multiple drag and drop options will open up. Drag and drop a ‘Notification’ block and a ‘Script’ block onto the window. Connect the Start’s arrow to the Notification block and connect the Notification block to the Script block.

5. In the Pipeline Block Editor under the Notification tab, choose your notification profile from the dropdown. Under the Contacts tab, choose your roster from the dropdown.


6. The pipeline diagram should look something like this:

7. Double click on the Script block and the Script editor will pop up. Here is where we add the code to send notifications to Telegram. You can adjust the code to send notifications to the users specified in the roster you created after sending them emails.
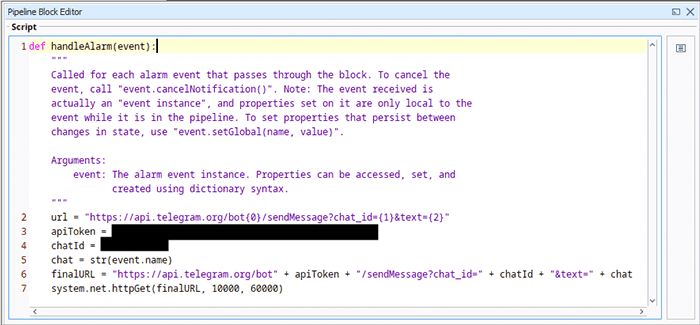
You can also configure your chat variable to send a specific message to the user, or any alarm event property. Remember to add your personalized apiToken and chatId to the respective variables. Save your script and project.
8. Now to connect your notification pipeline to your tag. Double click on the tag, open your tag Alarm options, and scroll down to the Notification option. Click on the dropdown next to ‘Active Pipeline’ and choose your pipeline. Click on ‘Commit’.

9. Once your tag alarm has been triggered, you will receive a notification from Telegram with your specified message:

5. Summary
To send notifications from your Ignition project to Telegram here is a summary of what you need to do:
- Download and configure a bot in Telegram
- Find the chat ID and API token in Telegram
- Create a basic Ignition project / Launch an existing project
- Set up the connection between Ignition and Telegram
For additional resourcing, please direct yourself to the Ignition user manual.